Help
- Security
- Leak protection system
- Video
- Climate
- Control
- Power
- Lighting
- Mobile Application
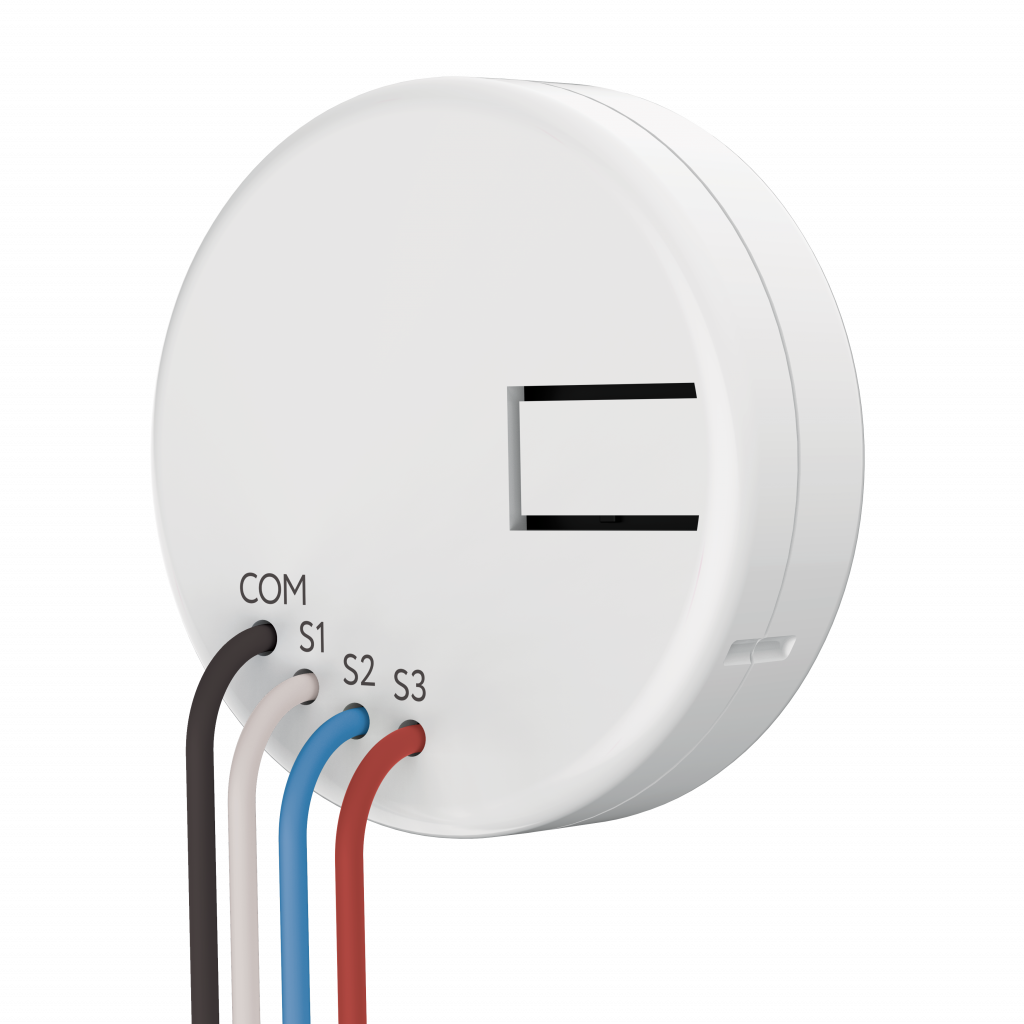
Wi-Fi double switch relay
Relay is designed for remote control of independent load up to 1.5 kW each. Is provided with power measurement function.
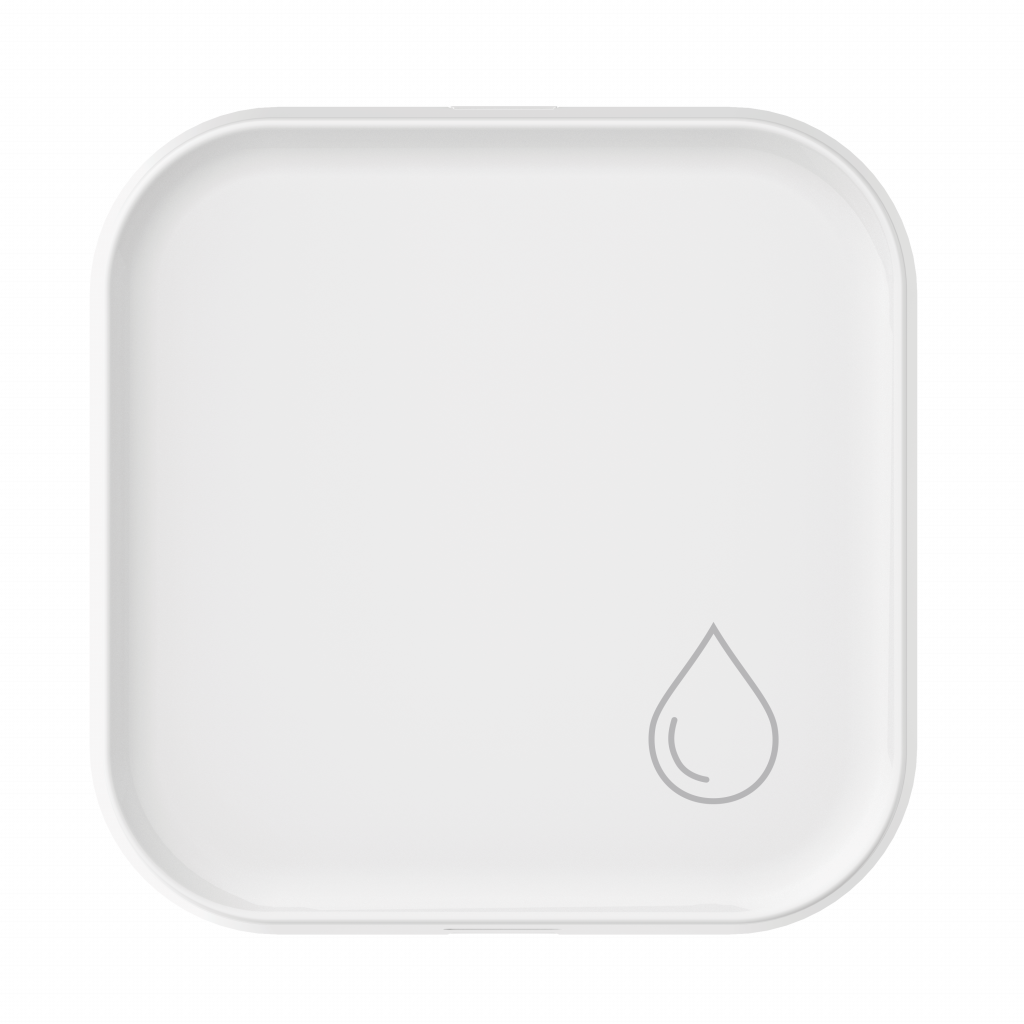
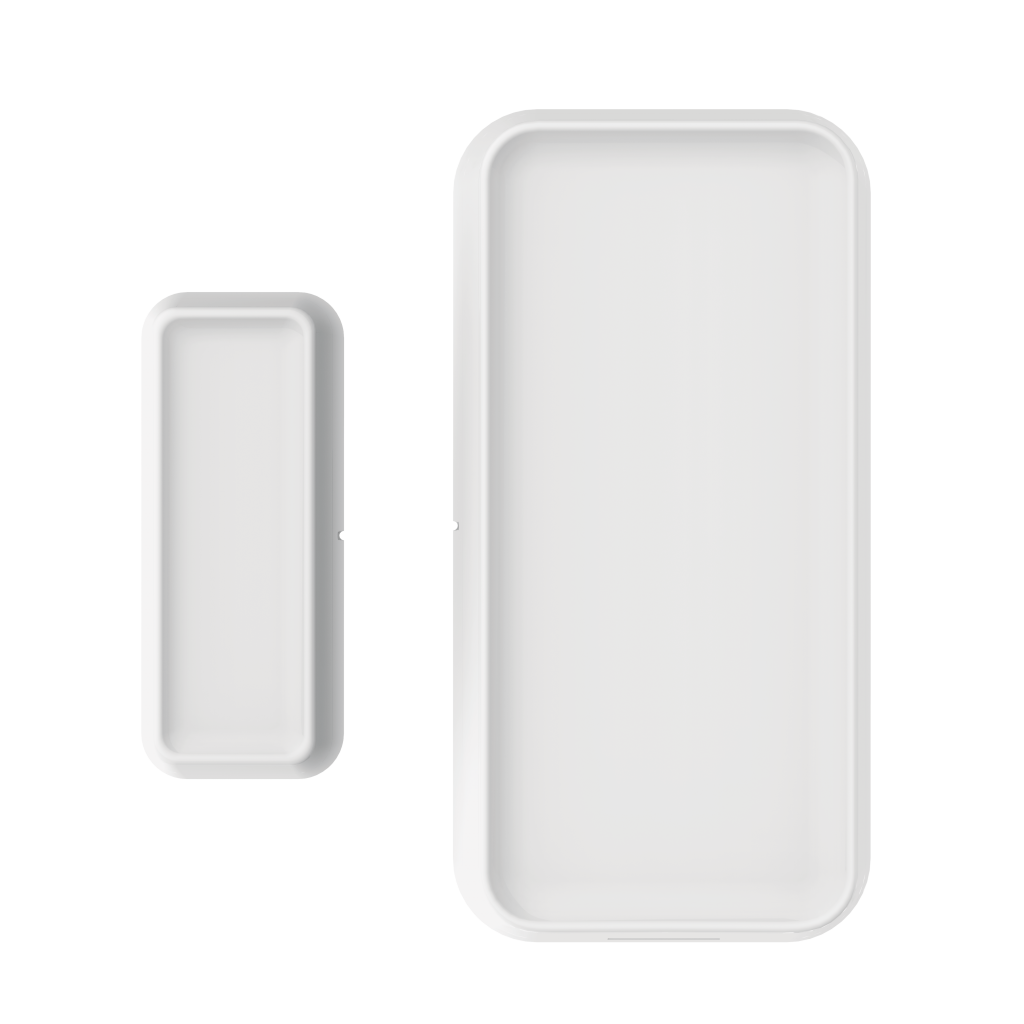
It is a receiver and allows you to connect external wireless sensors operating on RF 868 MHz technology.
Available devices:

Principle of operation
The device is a flush-mounted relay that closes and opens an electrical circuit. It controls two independent loads up to 1.5 kW each.
Relay supports the power consumption monitoring function that allows monitoring instantaneous power and power consumption for a specific period in a mobile app.
Features
What devices can be connected?

Underfloor heating

Lighting
Boilers

Sockets

Ball valves

Curtains and louvers
Garage gates

Sprinkler systems
Attention!
Be sure that power line is de-energized before installation. During electrical installation, do not allow any contact between the conductor strands and the relay terminals. Use swage, if necessary. Conductors shall be securely fixed in terminals.
Relay shall be places within operating range of stable Wi-Fi network.
Installation
Hookup relay according to wiring diagrams, provided in manual.
Do not connect a load that exceeds the recommended values to the device
It can be installed on horizontal and vertical surface. Relay can be installed in standard installation box (socket box)
It is recommended to use increased depth socket box.
It can be installed in electric junction boxes, hide behind luminaires, stretched and suspended ceilings.
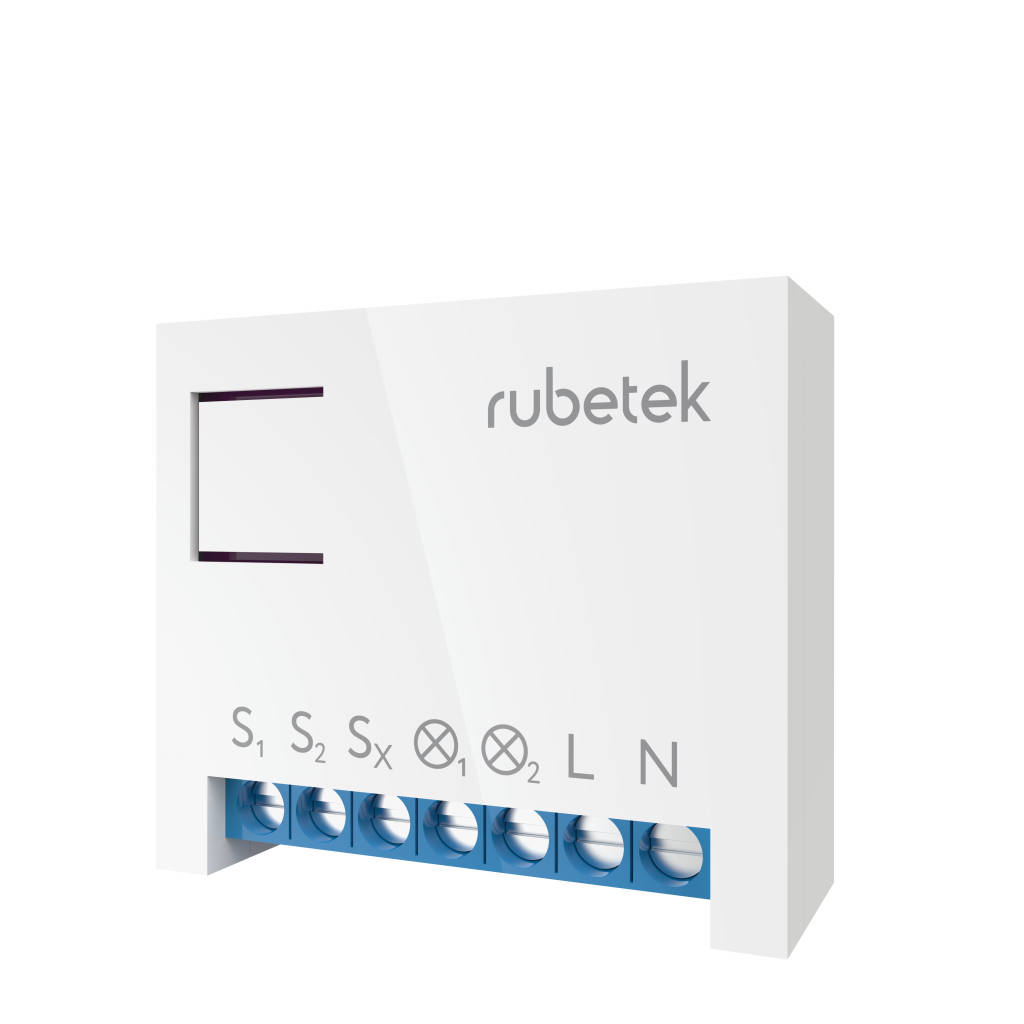
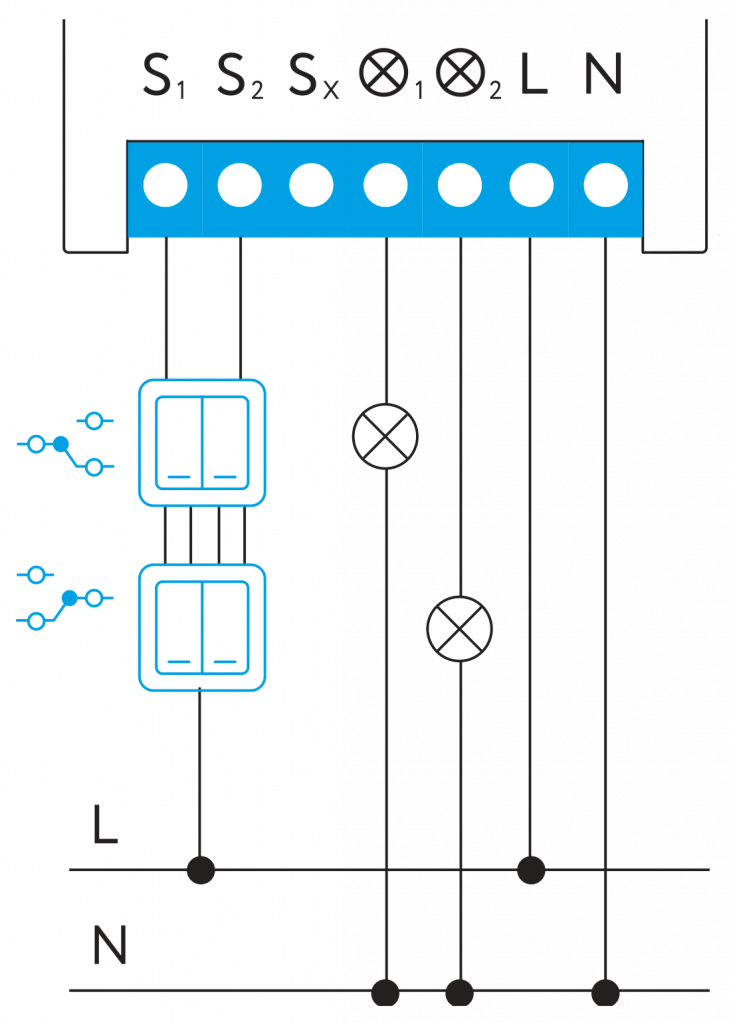
Structure diagram
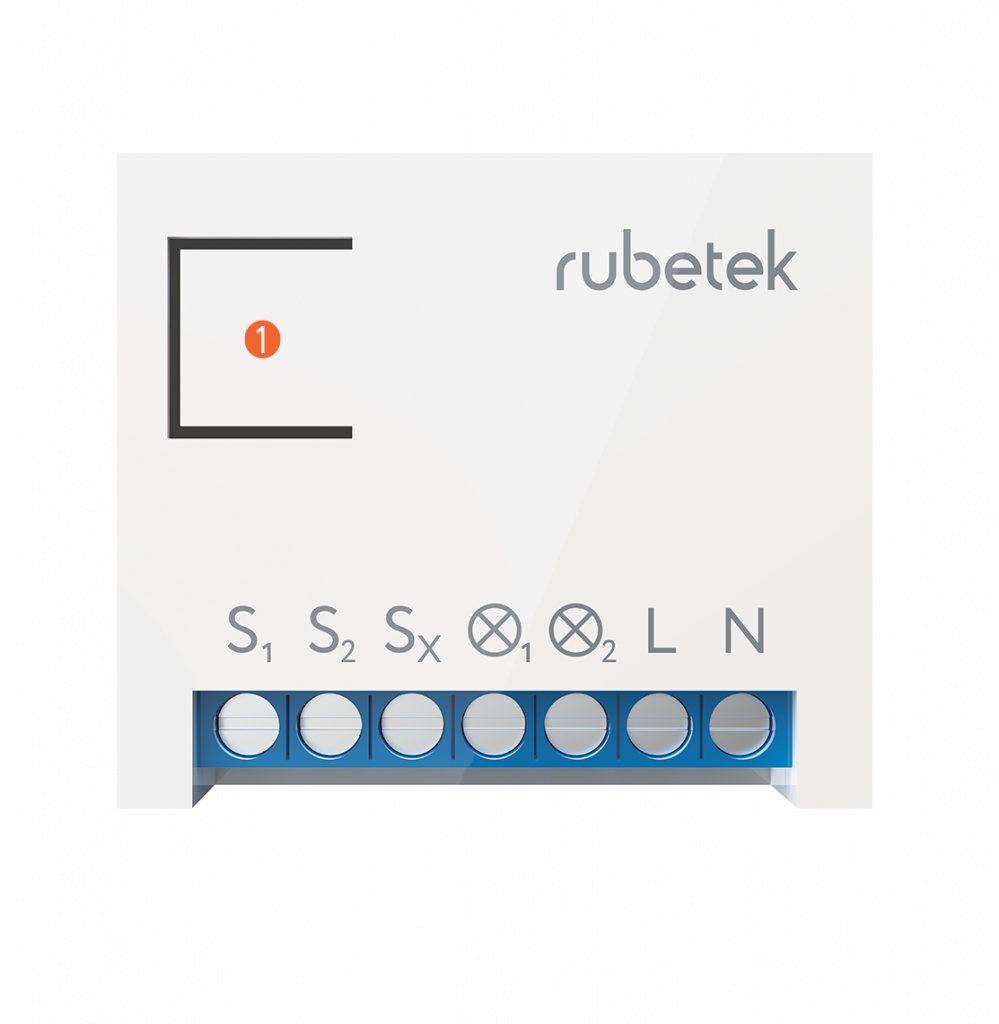
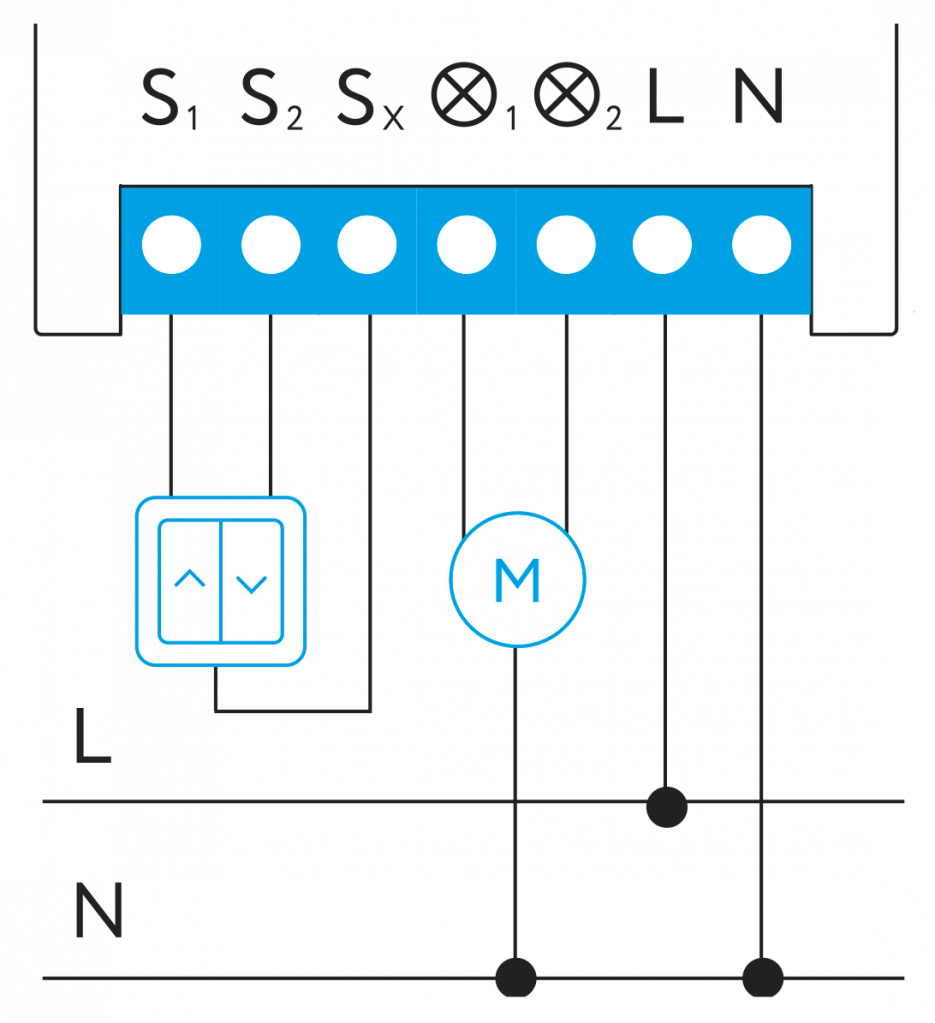
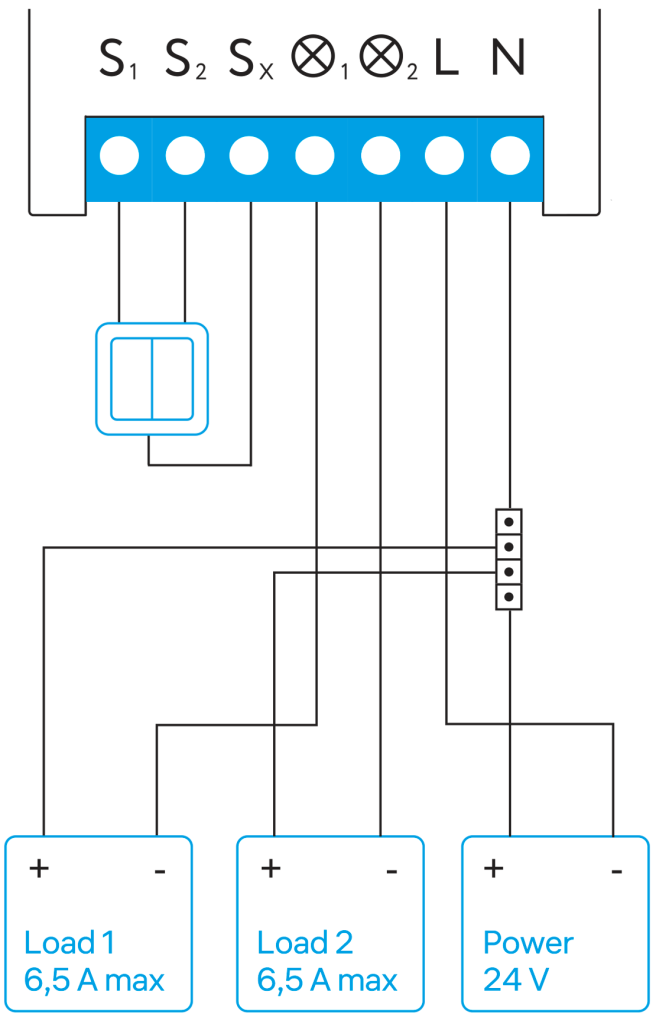
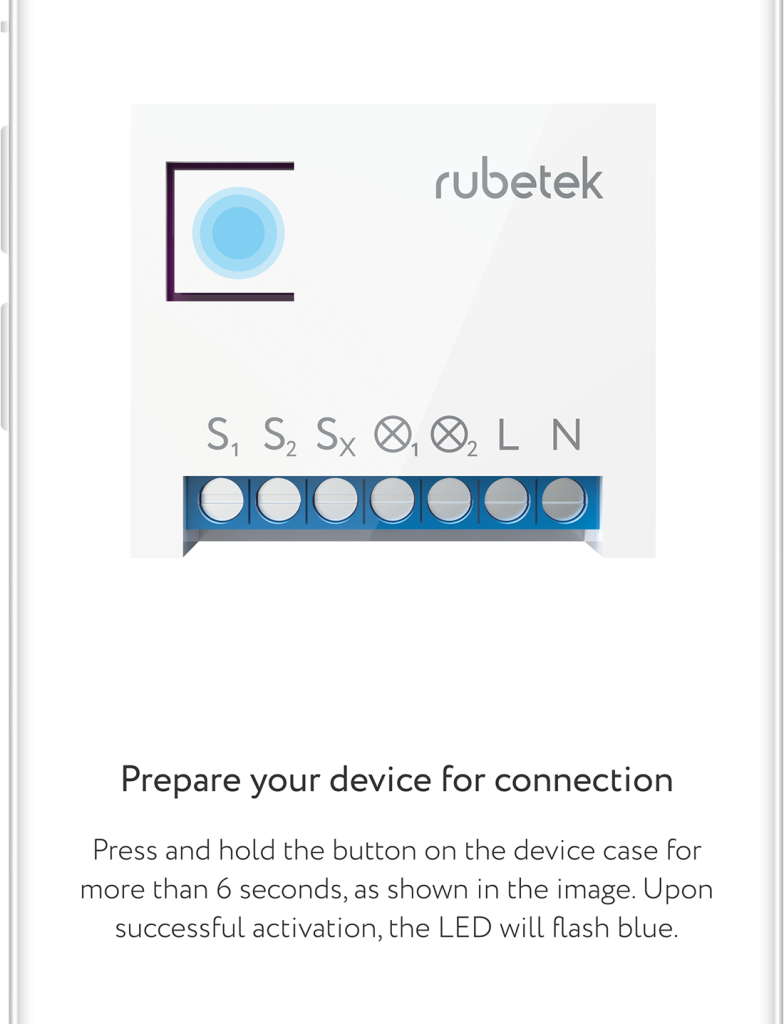
S1, S2, Sx – Switch button terminals.
 1 , 2 – Terminals for connecting a load.
L – Phase.
N – Neutral.
Connection of the relay
Ensure that electrical line to which you are going to connect relay is de-energized. Follow safety procedure!
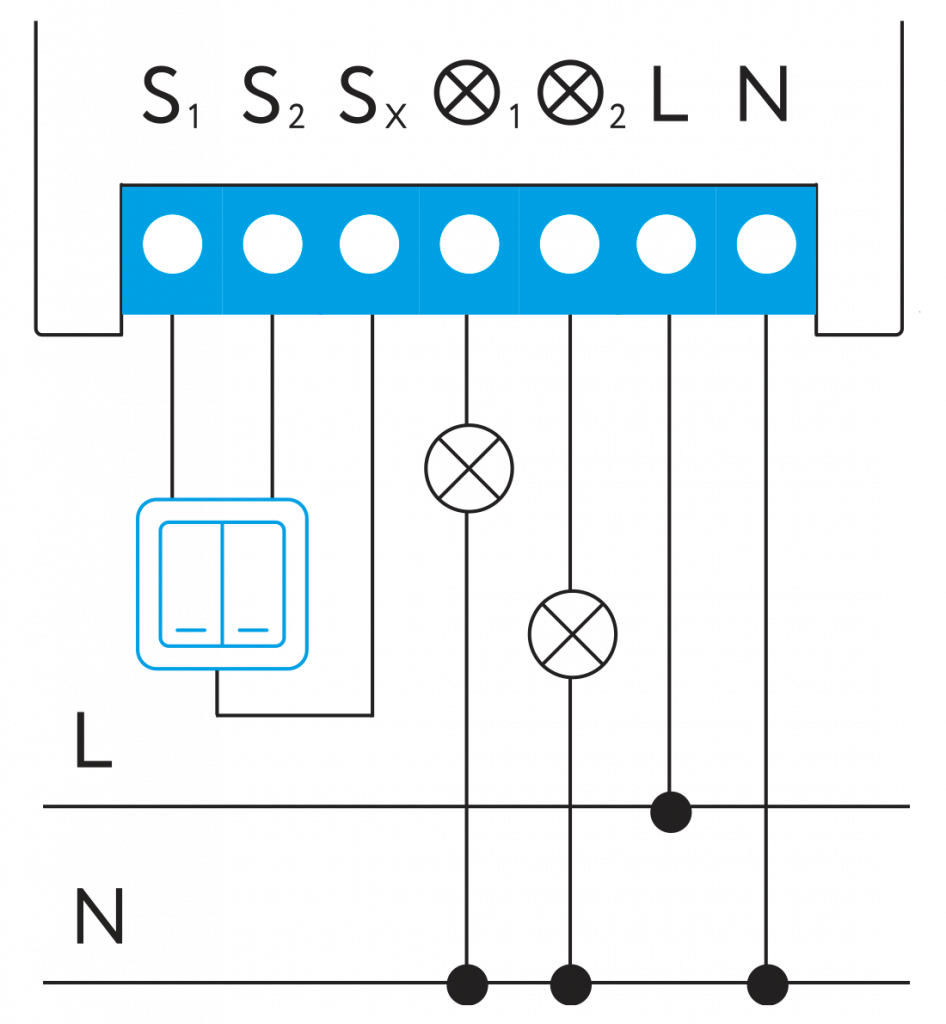
Connect relay according to diagrams, provided below:
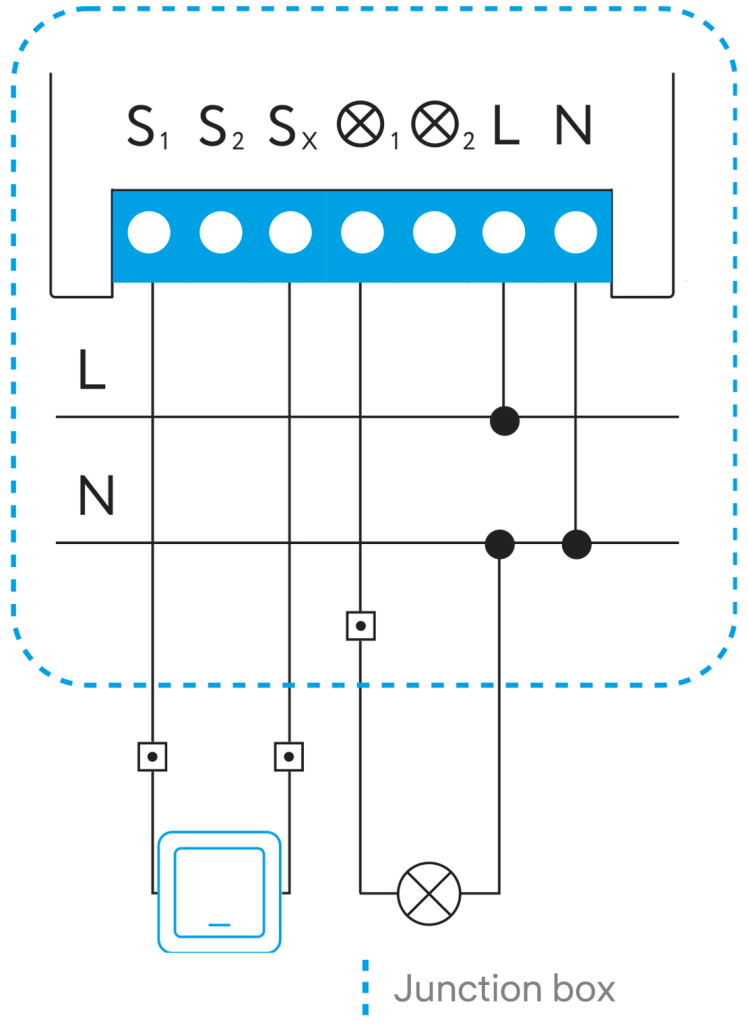
Single-button switch

Two-button switch
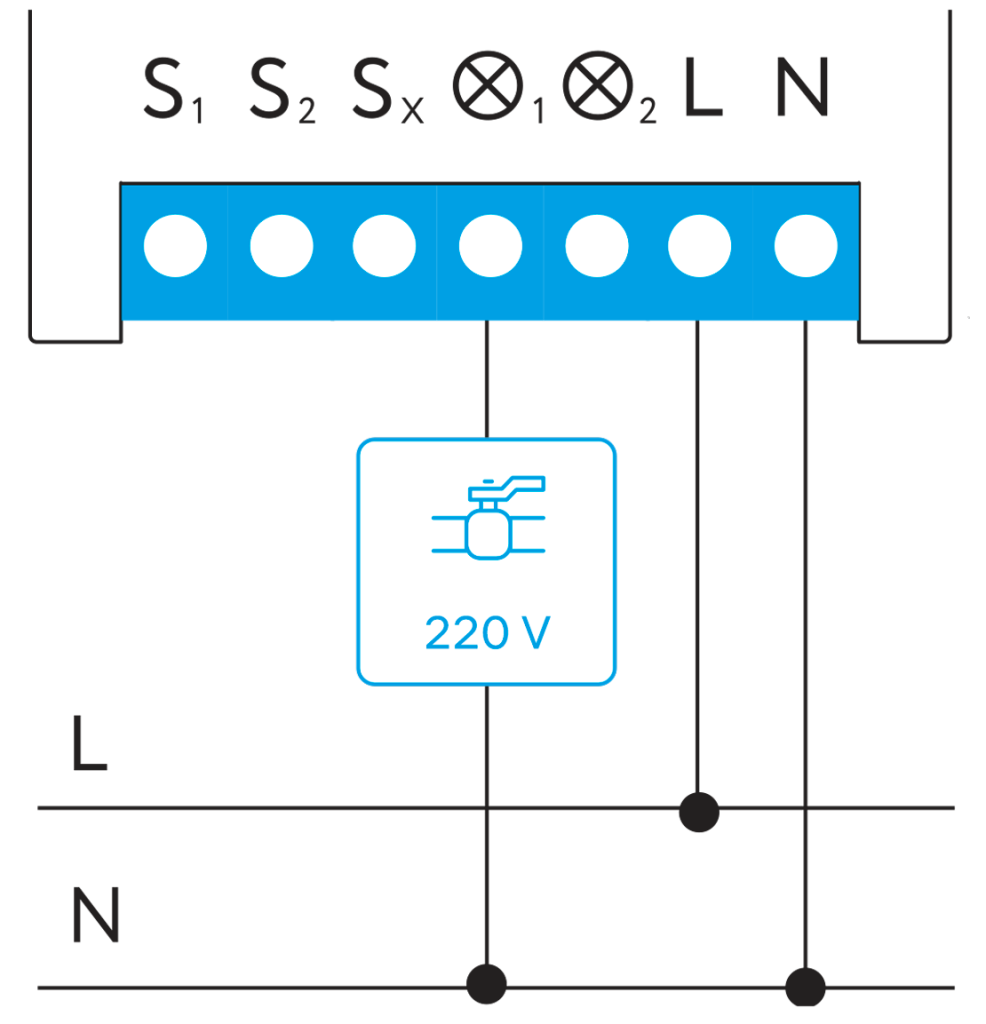
Control of electrically-driven ball valve
Control of servo-actuated ball valve
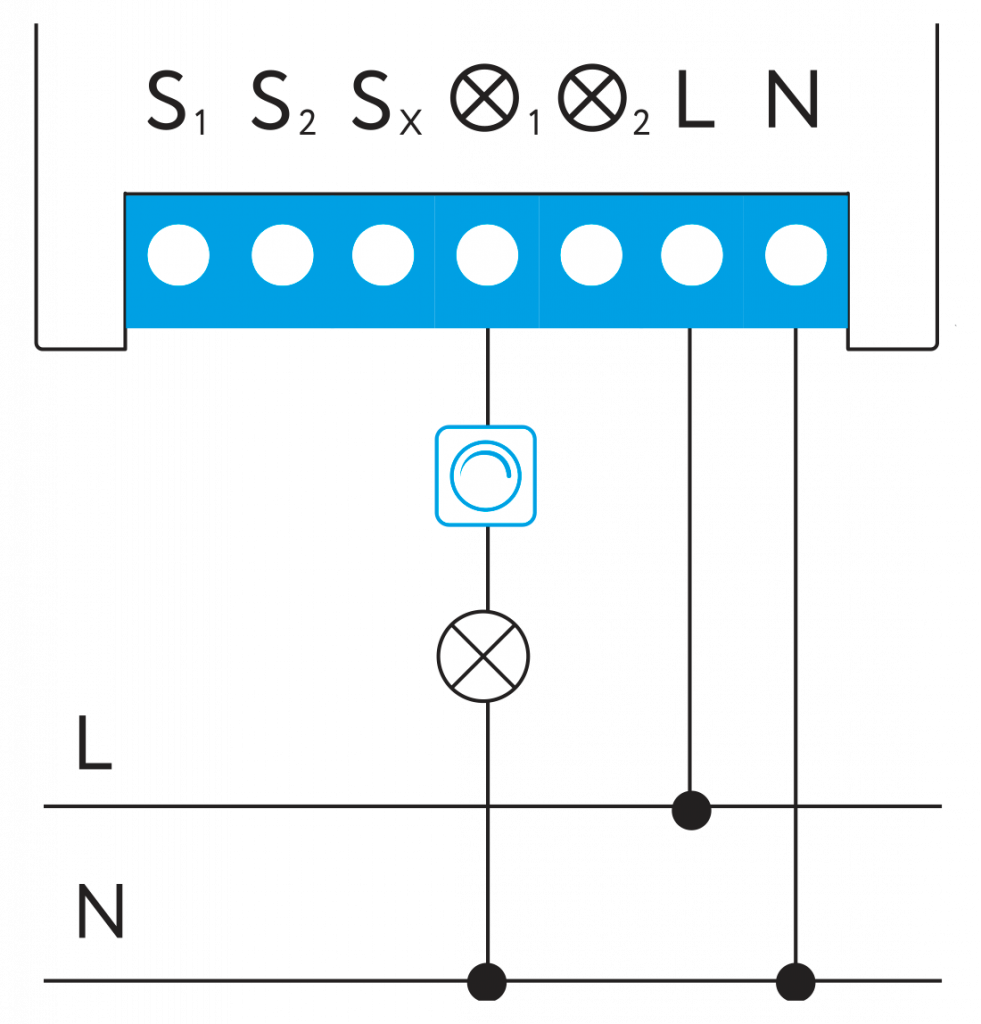
Control of dimmer, temperature controller and underfloor heating
Lighting by two one-way single-button switches
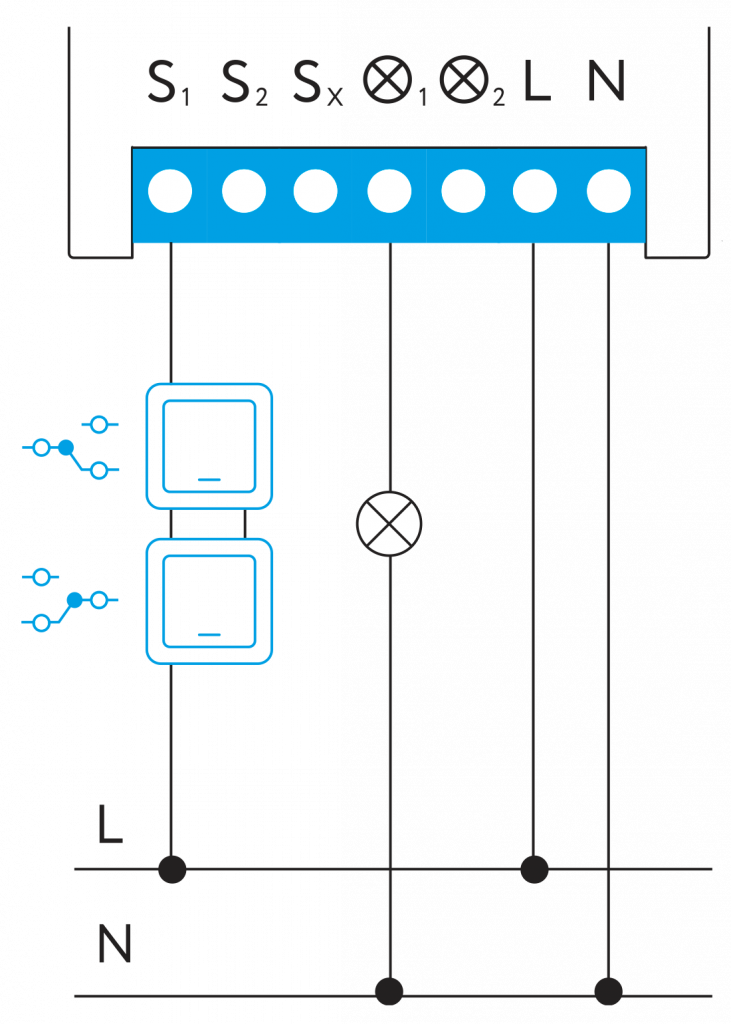
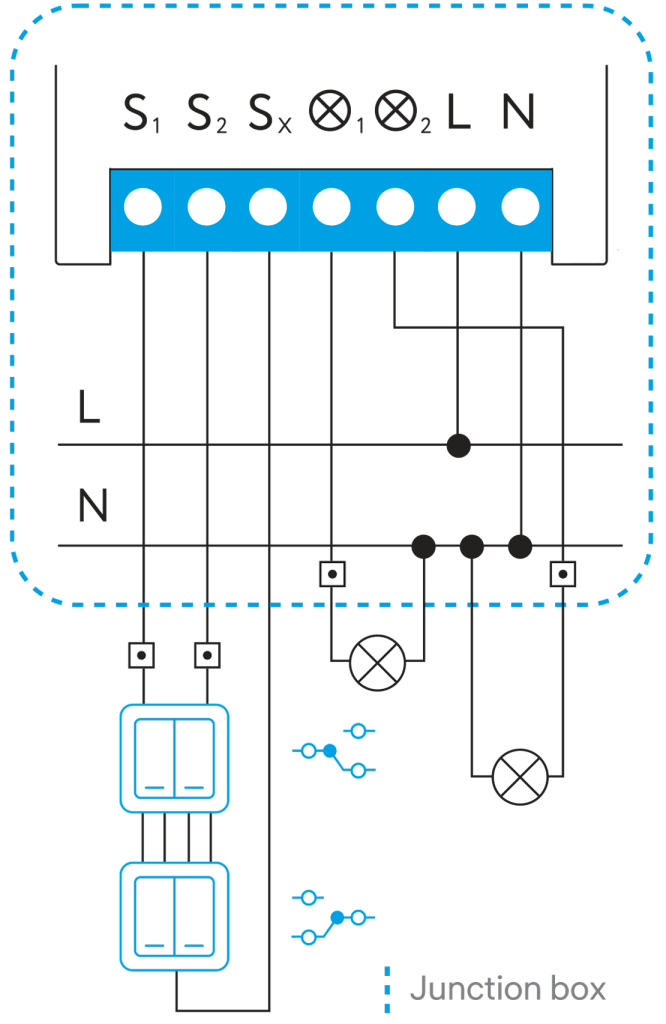
Lighting by two one-way two-button switches
Lighting by two one-way switches in junction box
Lighting by three one-way switches in junction box
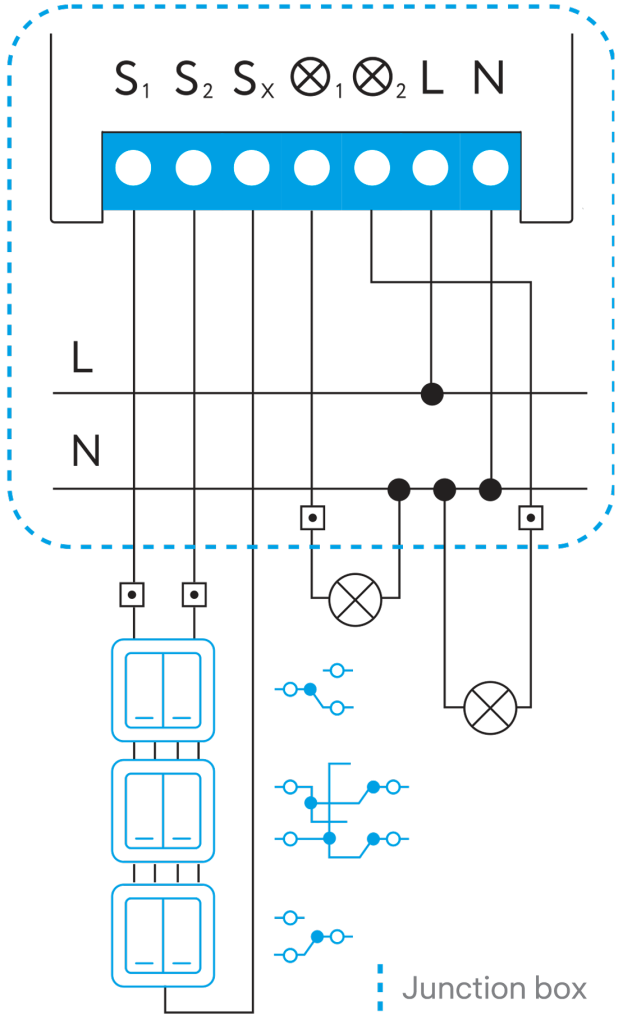
Installation behind ceiling or in junction box
Control of electric actuator of curtains and louvers (220 V)
Control of electric actuator of curtains and louvers (24 V)
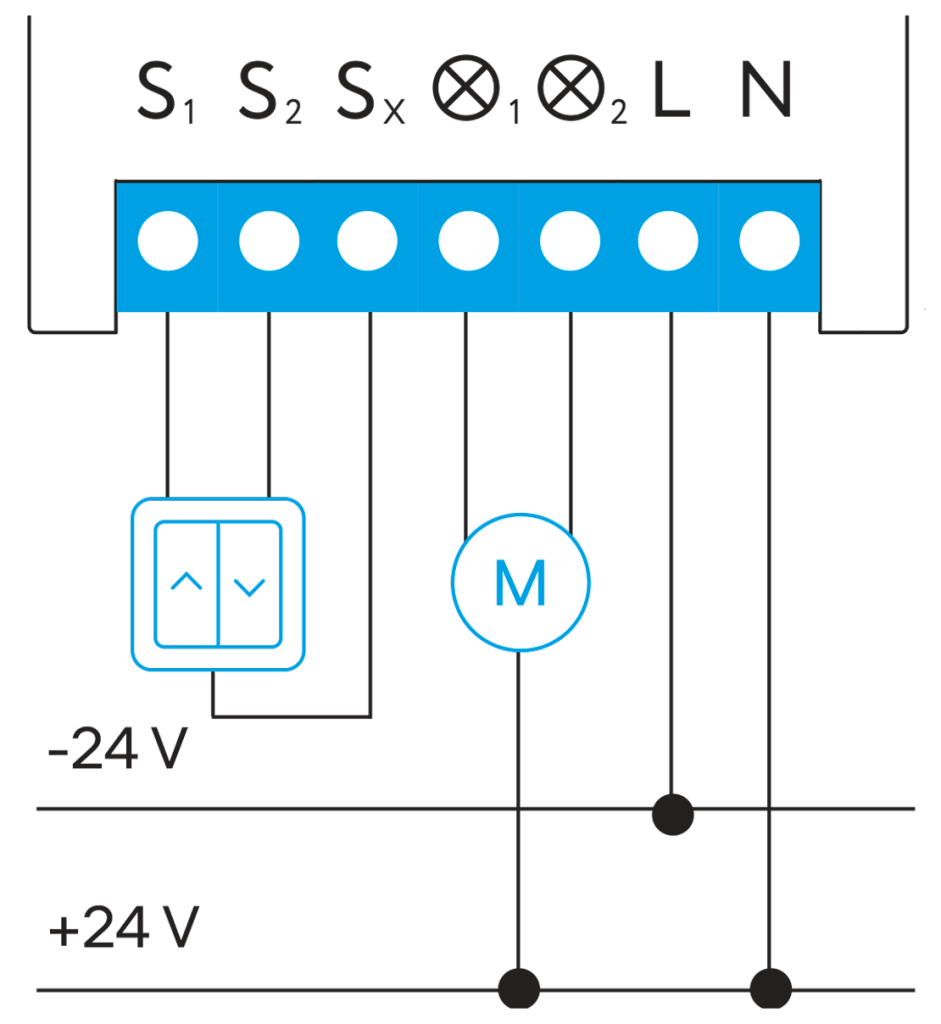
Control of 24 V devices
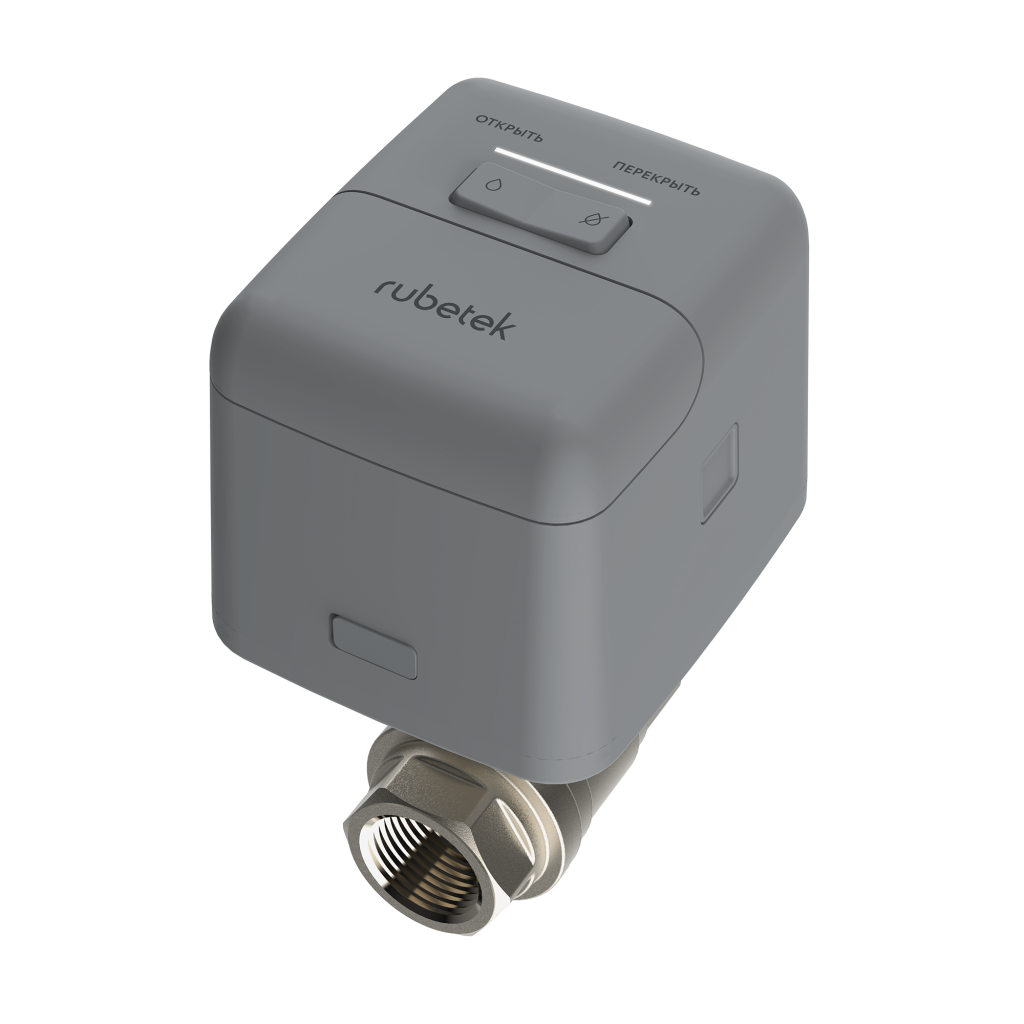
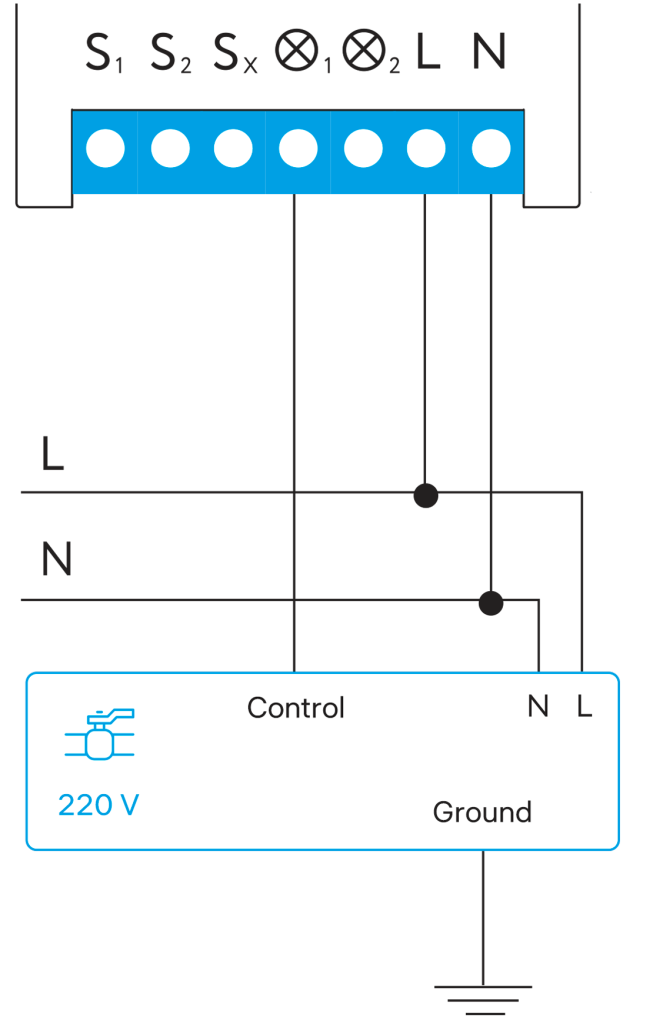
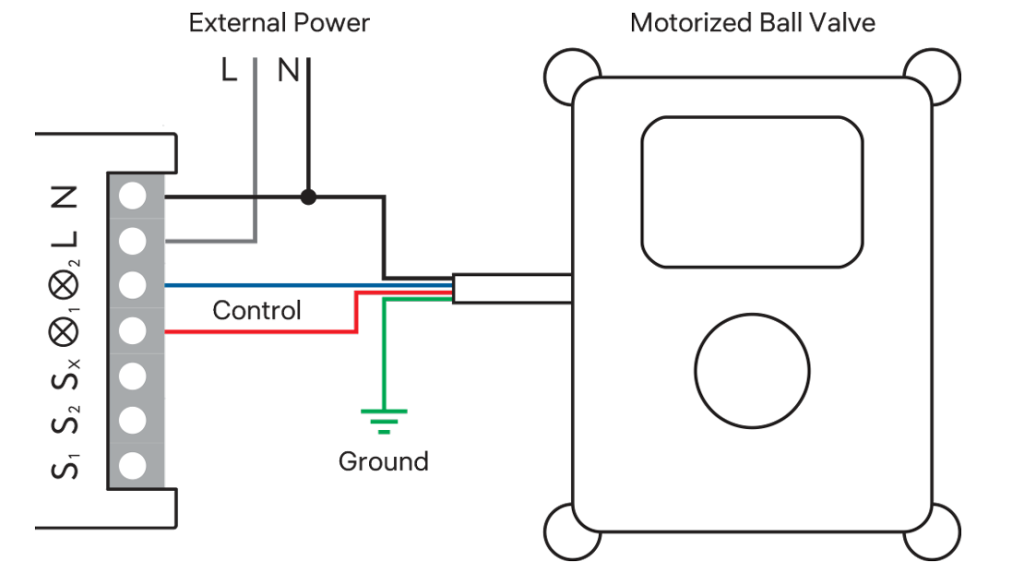
Ball valve
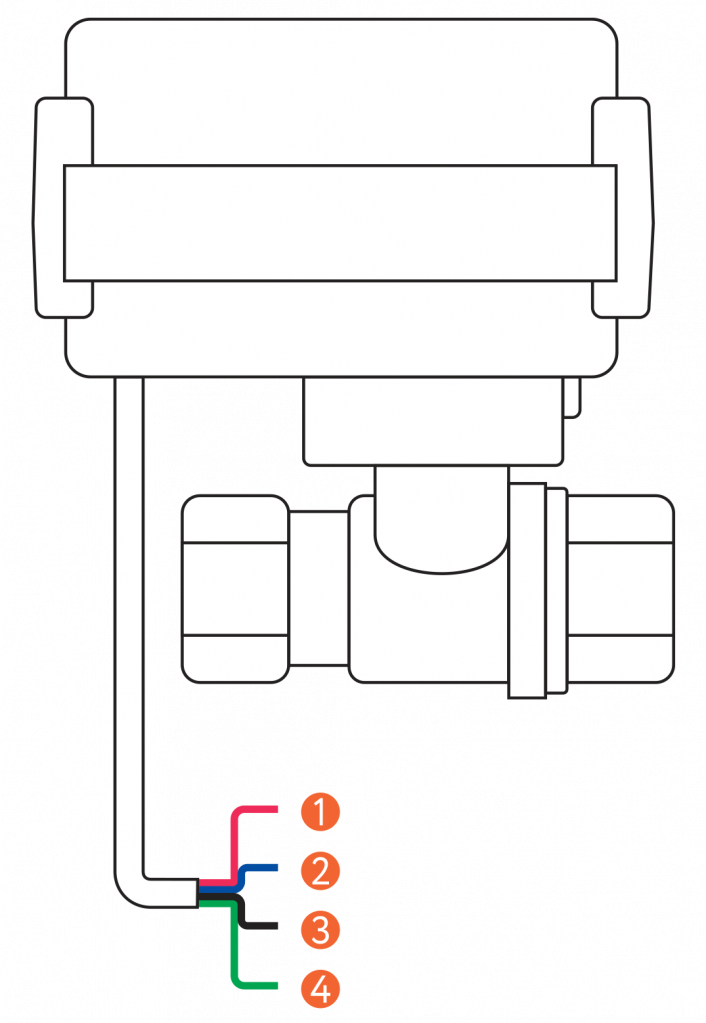
Connection of the relay and ball valve
- Install actuated valves on pipes though which hot and cold water is supplied.
- Ensure that electrical line to which you are going to connect relay is de-energized. Follow safety procedure!
- Connect relay according to diagram.
Mobile app
Download and install rubetek application from App Store or Google Play.
You can use QR-code.
Create an account and confirm your mobile number to use the application.
Adding to application
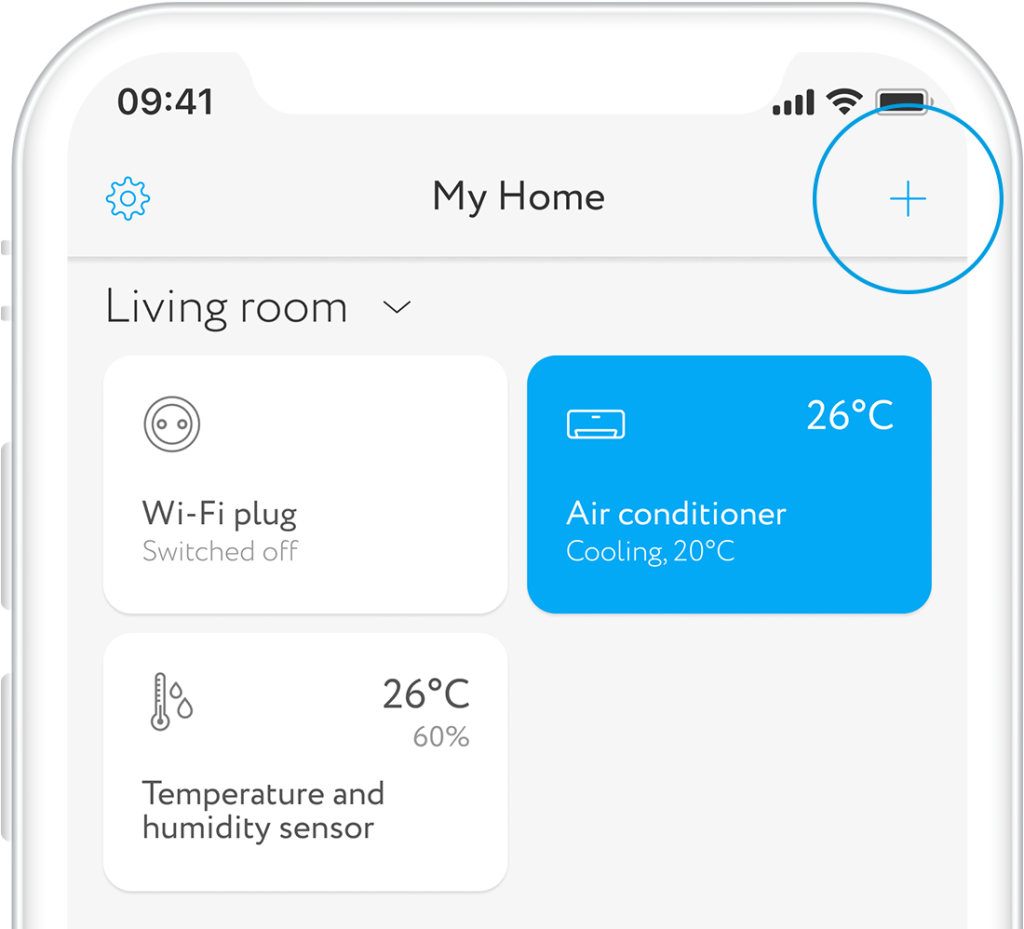
- Open rubetek application.
- Press “+” in top right angle of the main screen
- Select “Add Device”
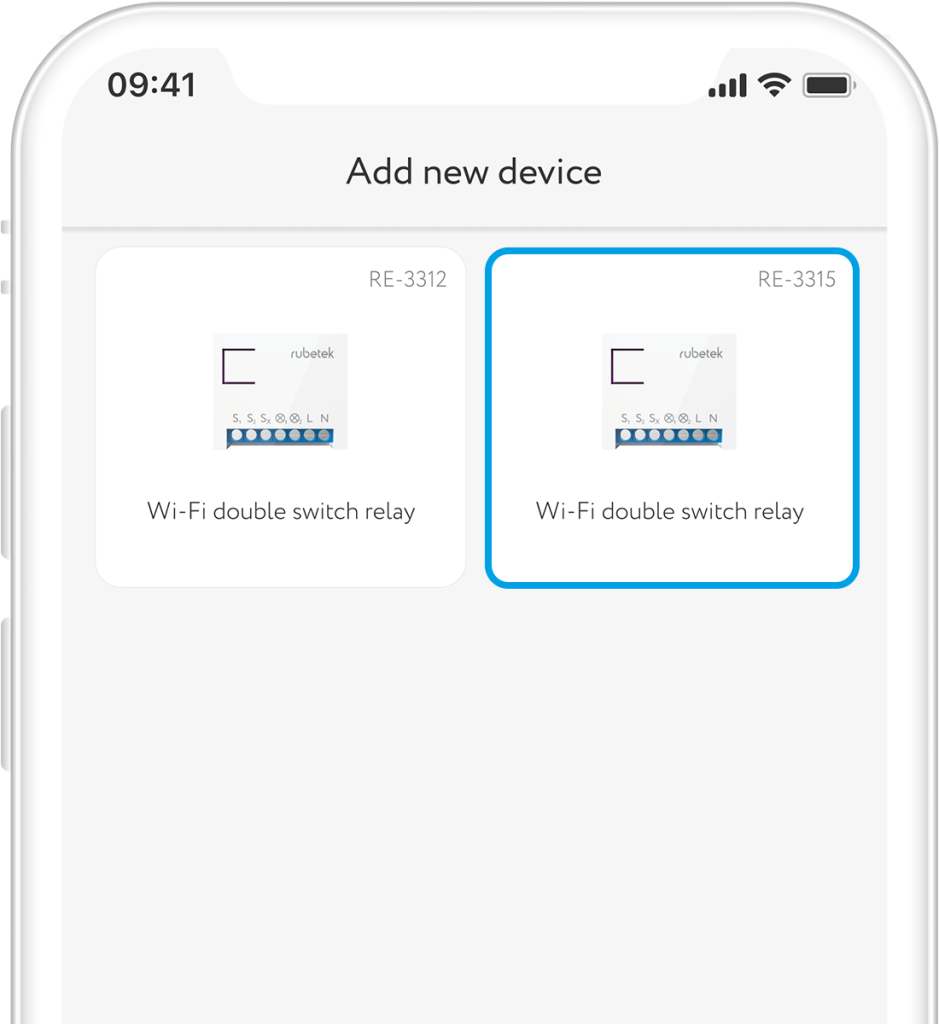
- Select Power supply → Flush-mounting→ Wi-Fi double switch relay → Wi-Fi double switch relay RE-3315 in the list of devices
- Press and hold the button on the case max. 6 sec. If activation is successful LED will flash blue.
Operation mode
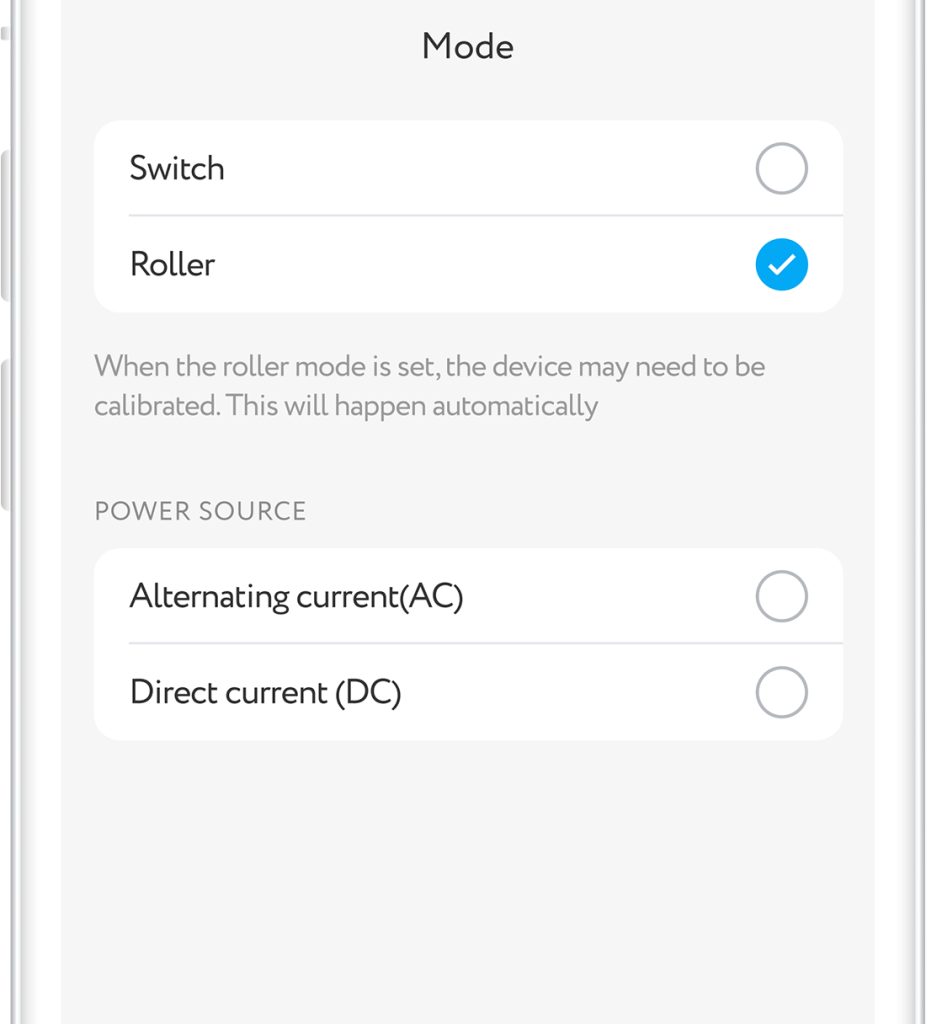
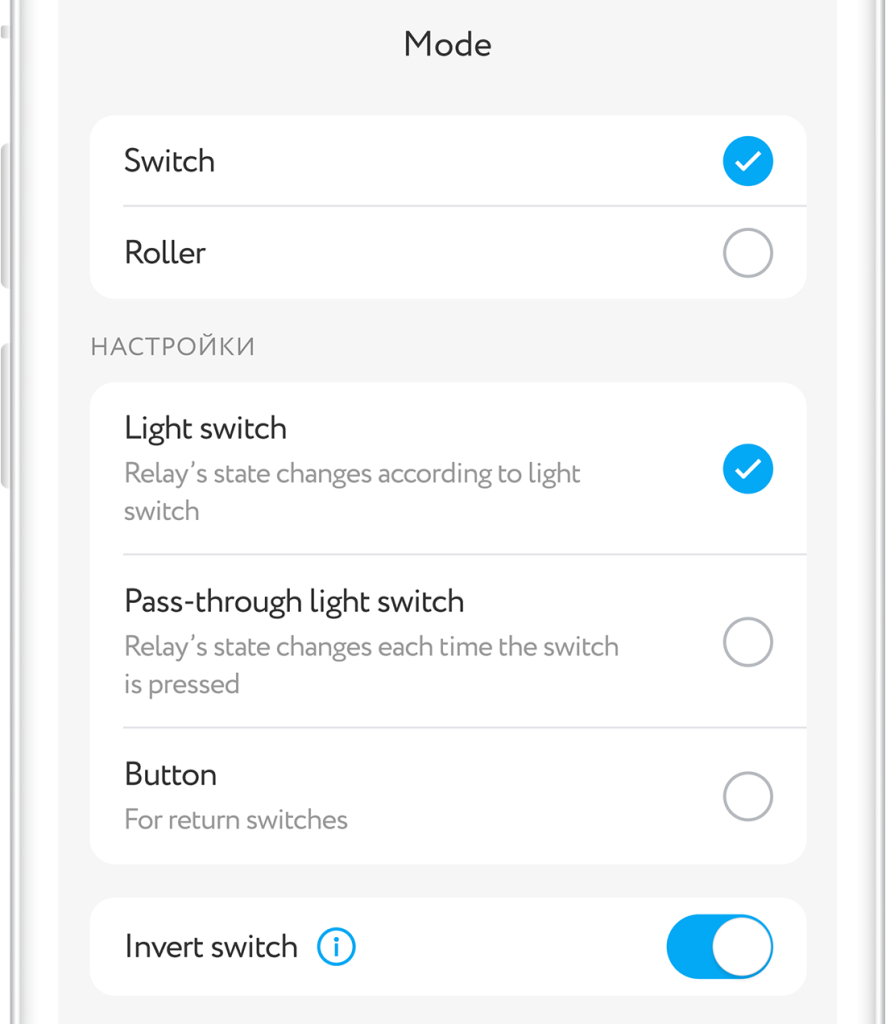
Relay has two main operation modes: Switch and roller.
In roller mode you can control electric actuator of gates, rolling shutters and louvers.
Three types are available in switch mode:
Light switch — relay closes and opens electric line, providing operation of the device with standard key switches.
Pass-through light switch — relay’s state changes each time the switch is pressed.
Button — allow controlling non-latching switches, e.g. button switches.
Calibration
The device shall be calibrated for correct operation in Roller mode.
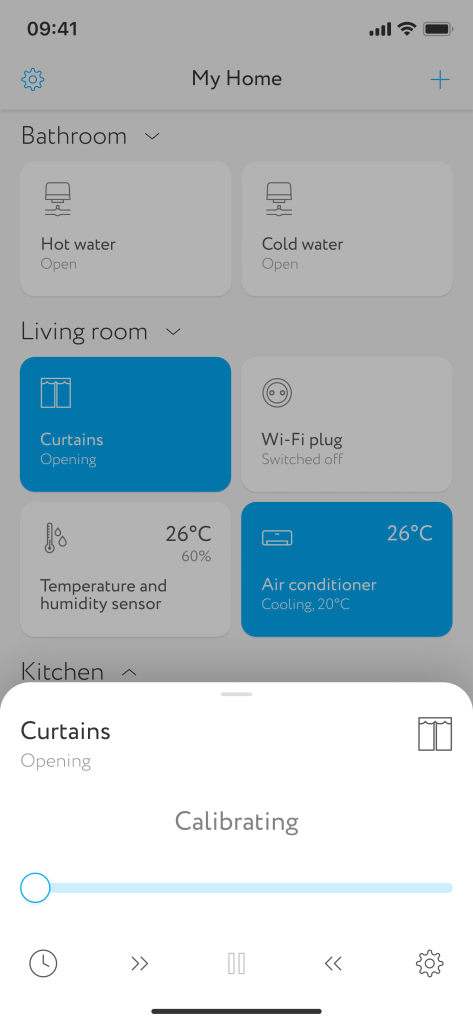
Go to control screen in application and press opening button. Wait for complete opening of curtains/gates or other equipment Press closing button and wait for complete closing. Your device has been calibrated.
Interface
To turn the relay on/off, a single press on the tile of the device is sufficient.


150W


Control shade
To open control shade, press and hold its tile on device list screen
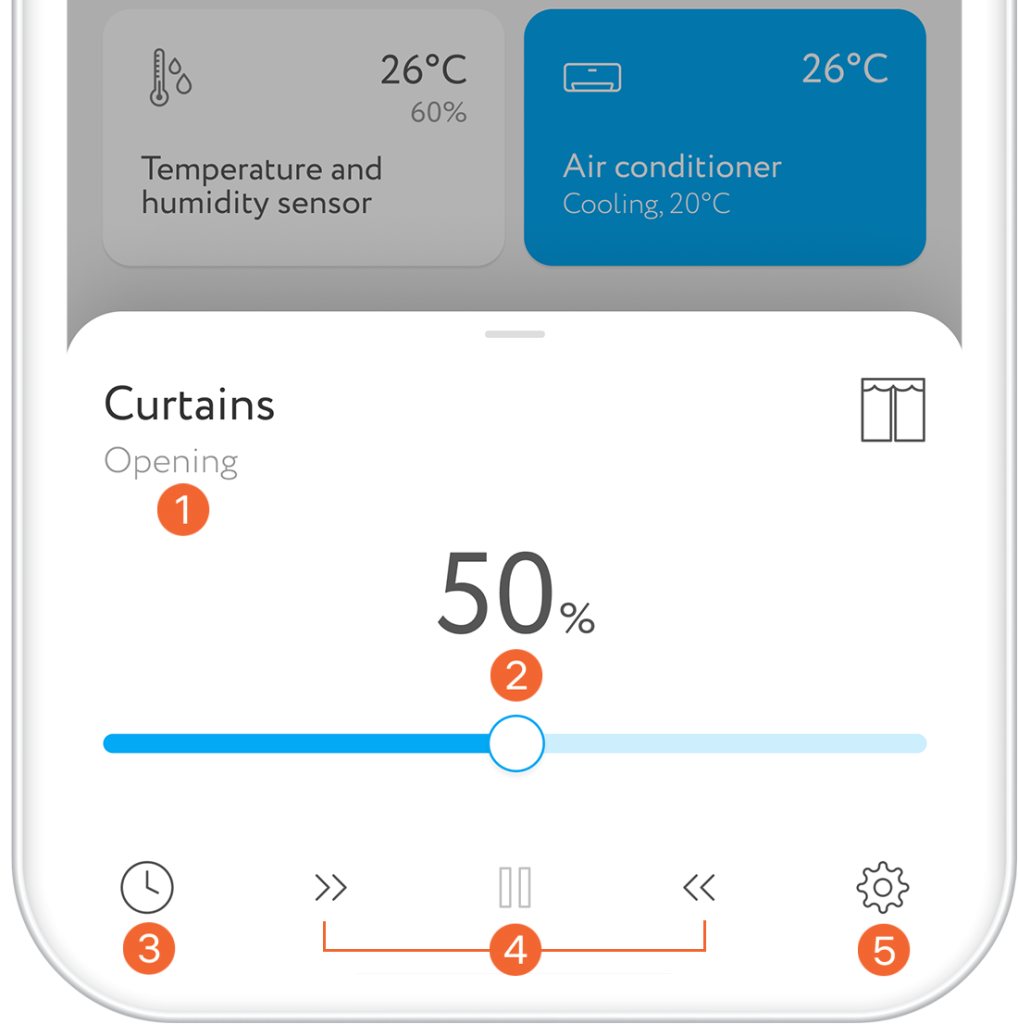
Settings
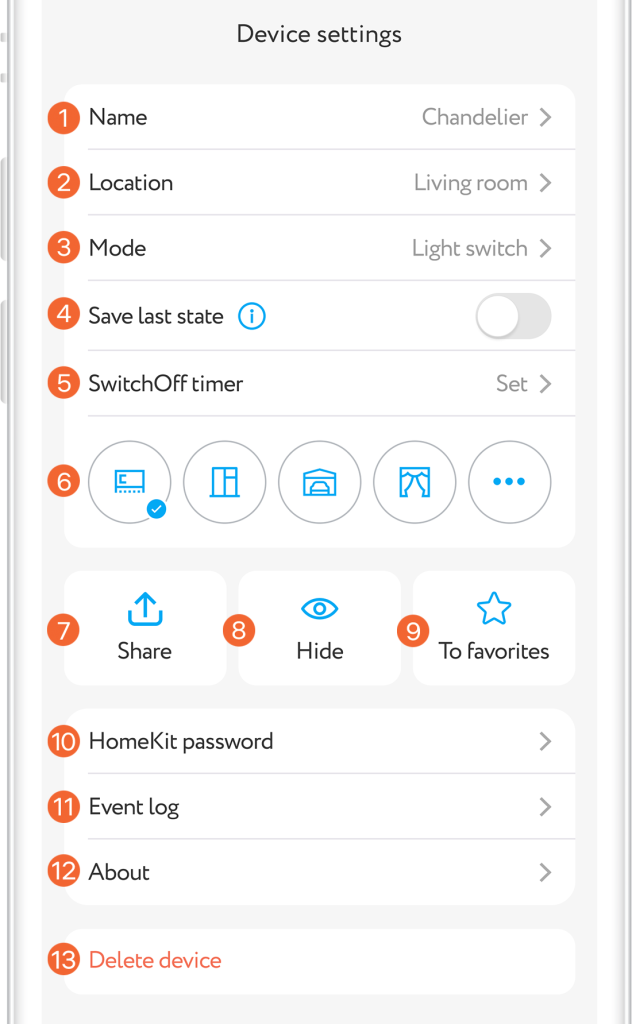
Go to control panel to get to device settings.
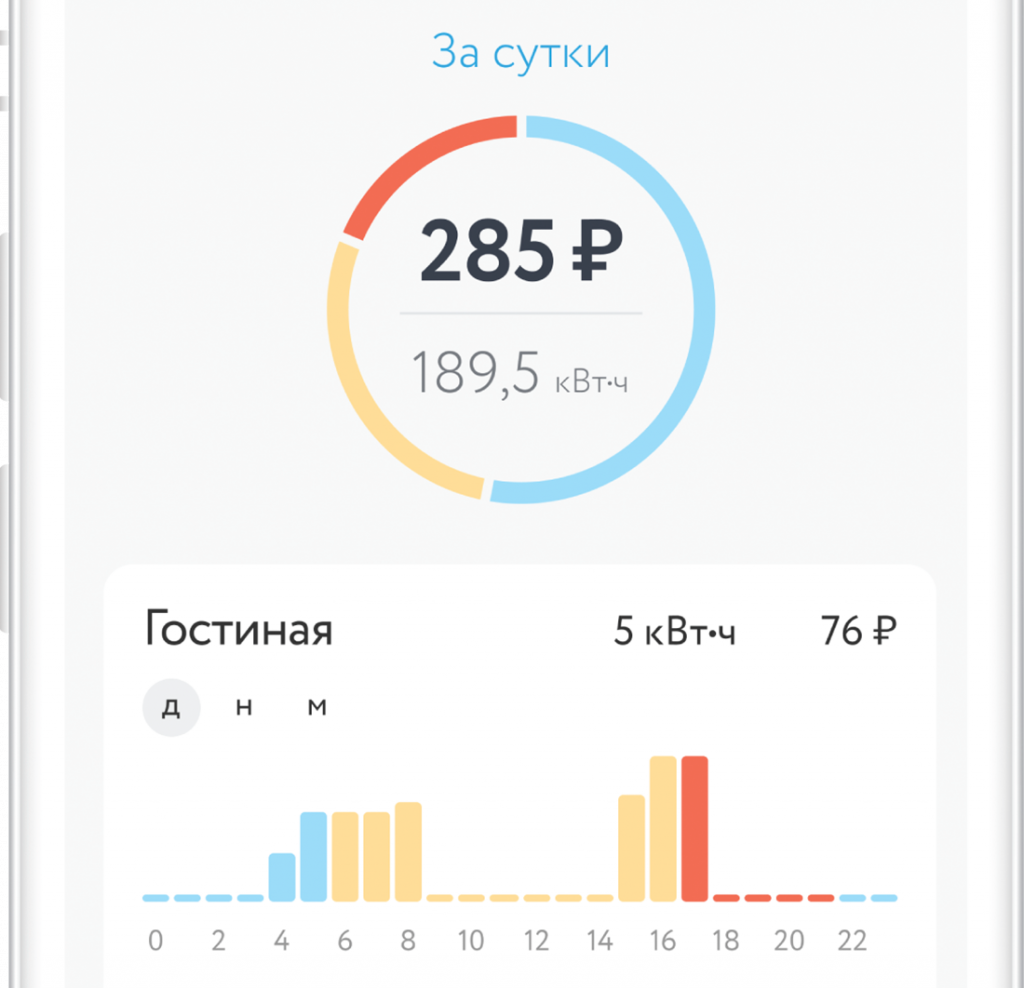
Power consumption statistics
Drag main menu shade up to get consumption report.
Using filter you can see statistics per day, week and month. Statistics is displayed for the whole device, not divided per channels. In order to have statistics by value, set up rates.
Sensor management
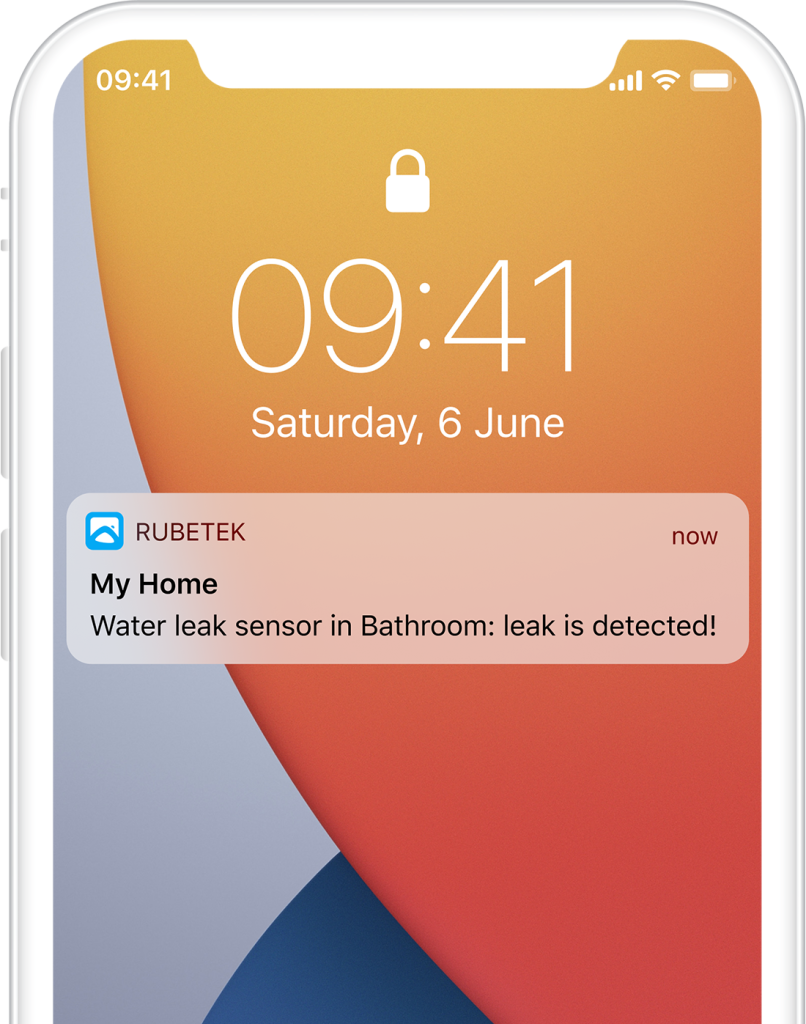
Relay plays the role of master device in house. The device collects the information on sensors operation, analyses data and immediately sends signal to your smart phone in case of alarm.

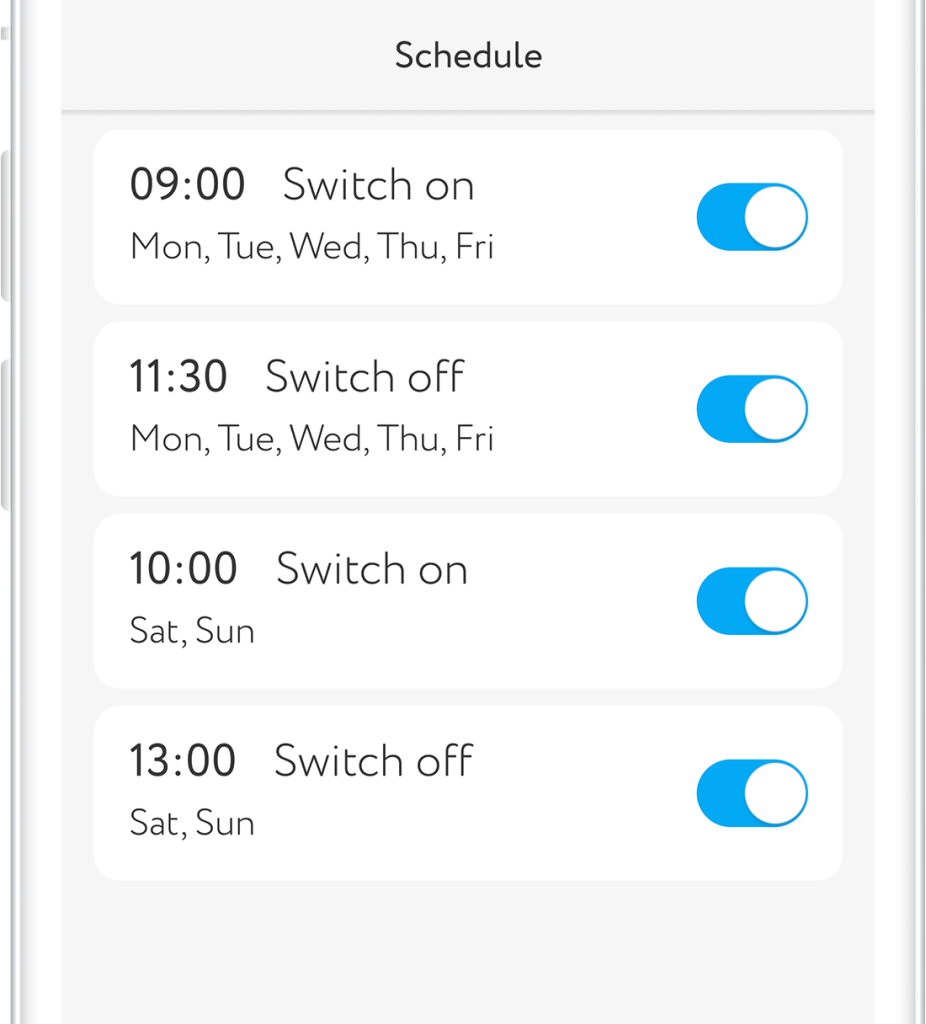
Timers
Relay supports up to 10 timers for switching on and 10 timers for switching off. The will be in operation regardless of the availability of the Internet. Got to control shade and press its tile on the main control screen to set timers.
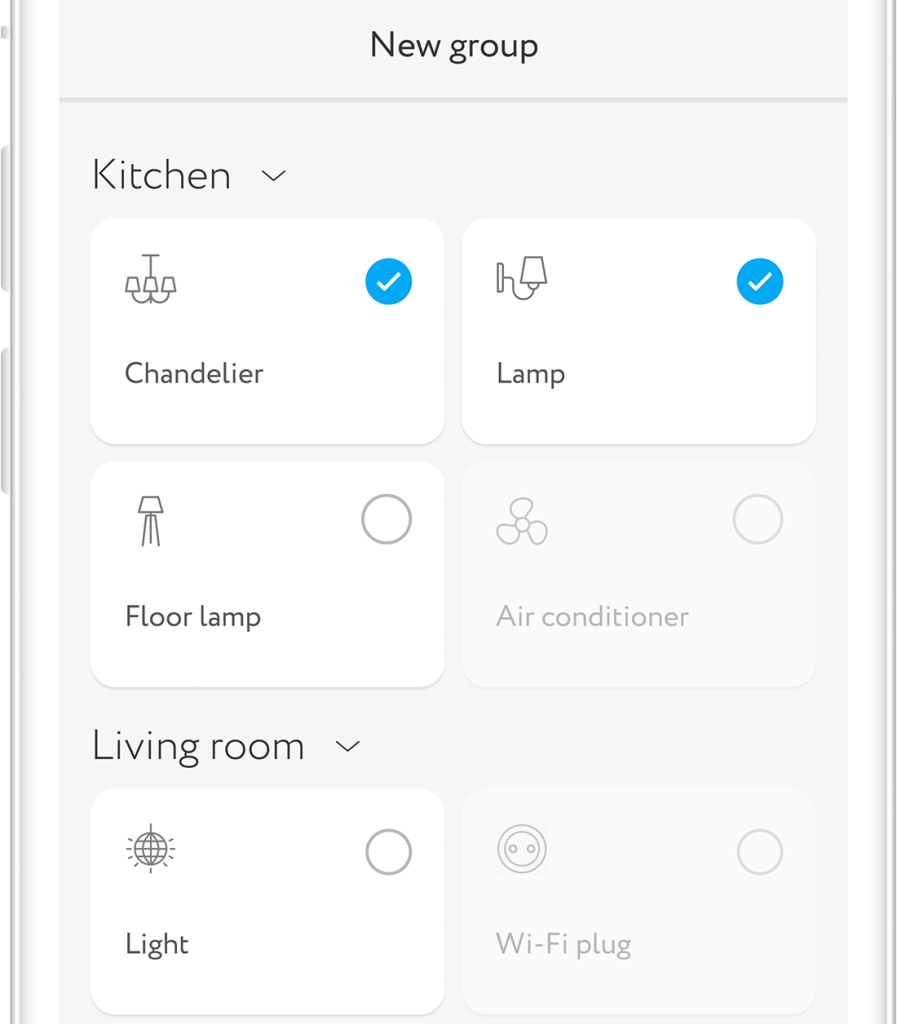
Grouping
Combine devices of one type in groups and control them simultaneously. In order to create new group, press “+” in top upper angle of the main screen and select “Create group”.
Push notifications
To use this function you should permit rubetek application to send push notifications. You can do it in your mobile phone settings.